Click on any picture for a larger view.
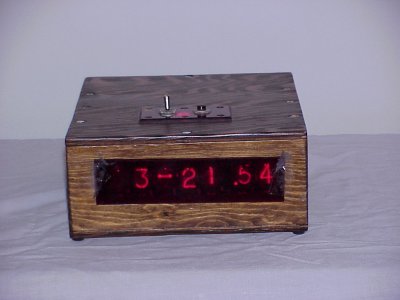
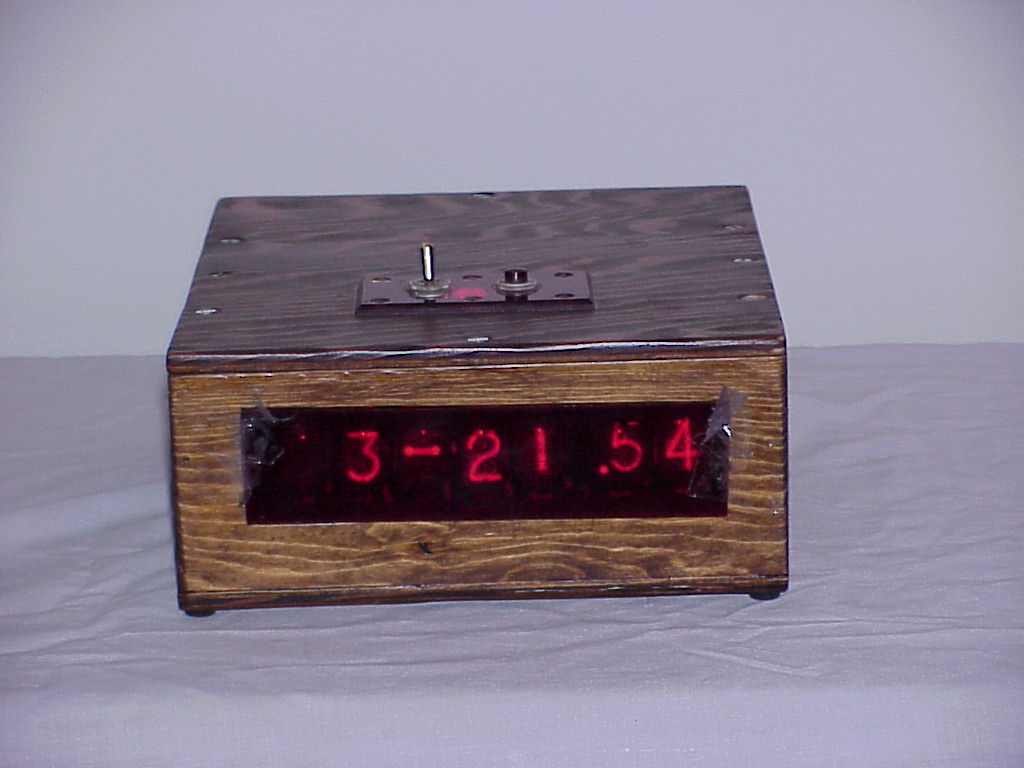
The Nixie Tube Clock. One of my most-used projects. It has been running 24 hours a day,
7 days a week for the last 5 years now without a hitch, waking me up every morning with its
police-siren alarm! The display uses nixie tubes, which are neon-filled gaseous indicator
tubes. When you put 150V DC across the terminals, it lights up. There are 10 stamped-metal
plates; each shaped like a numeral from 0 through 9.
Guts
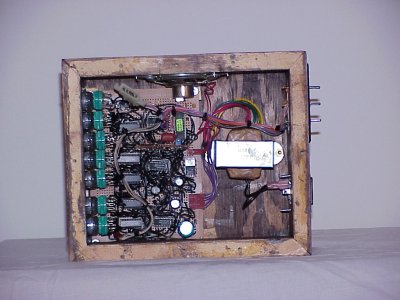
Here we can see the entire inside of the clock. Going Clockwise:
 At 12 O'clock is the speaker for the alarm. At 12 O'clock is the speaker for the alarm.
At 3 O'clock is the special transformer used to run the clock. It has a 180V winding as well
as a 7.5V winding. The 180V winding is used to run the nixies, while the 7.5V winding is for logic.
And finally, at 9 O'clock is the circuit board containing all the driver electronics and the nixies.
Board Close-Up
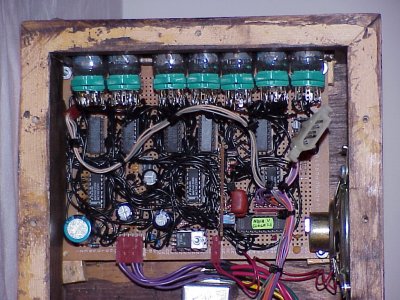
This is a close-up of the circuit board, showing all of the chips and other goodies.
At the very top are the 7 nixie tubes, each mounted in a green socket, which is L bracketed to the circuit board.
Their 39K 1/2W anode resistors are hidden from view.
Below that are 5 7441 nixie-tube driver chips, and below the white connector are 4 high-voltage transistors
used to drive the middle +/- tube (between hours and minutes) and the 10's position on the hours tube (shows blank, 1, or 2).
Below the 7441's are the 3 74HC259 8 bit addressable latches. These drive the BCD inputs of the 7441's, the
four above-mentioned HV transistors, and enables the alarm.
An LM386 audio op-amp is nestled between the two left '259s, and the board containing the siren is mounted
on can be seen sticking up vertically between the two right '259s.
And finally, at the very bottom, on the left is the 180V nixie tube supply; in the middle is the 7805 logic supply,
and on the right is the 87C750 microcontroller which holds the clock's firmware.
Running It Good
Running the clock is easy; it just plugs in the wall. Time setting is accomplished with the three center-return switches on the back. Pressing
the one closeset to the center up puts the clock in time setting mode. The other two switches control incrementing and decrementing of the
minute and hour, respectively. Pressing the switch closest to the center down puts the clock in alarm-set mode, and works like time set mode.
When you are in alarm set mode, the "-" that displays between the minutes and hours turns into a "+".
The big fat toggle switch on the top turns the alarm on and off. There's no mistaking that big *CLUNK* noise to tell you it has been flipped.
The big fat red pushbutton is the "snooze" button. Press this and the alarm will silence for 10 minutes (not bloody 9 minutes!!). Press it again,
and another 10 minutes will be added. The amount of snooze is shown while the button is depressed. Up to 59 minutes may be added.
Once the snooze runs out, the alarm re-sounds. While the snooze timer is counting, the seperator between the hours and minutes oscillates
between "-" and "+" every second. Of course, turning off the alarm cancels the snooze and resets it.
I purposely added a couple features to this clock that I've always wanted on an alarm clock, but that you just can't find anywhere.
A LOUD alarm that will wake me up. None of this piddly-arsed beep-beep crap. No, this has a real police siren
circuit and an LM386 running a fairly good-sized speaker. It gets me up!
An alarm that doesn't shut off after 2 hours. Nope, this one will go until the planets cease to exist. (or you shut it
off)
Seconds. I've not found a digital alarm clock that shows seconds on it. Guess those extra 14 LEDs are too
expensive.
24 hour format. You know, this is non-existant in the USA.
Easy time setting. All the clocks I've seen have crappy time setting on them. The inability to go down as well as
up when setting the time or alarm is a real nusance.
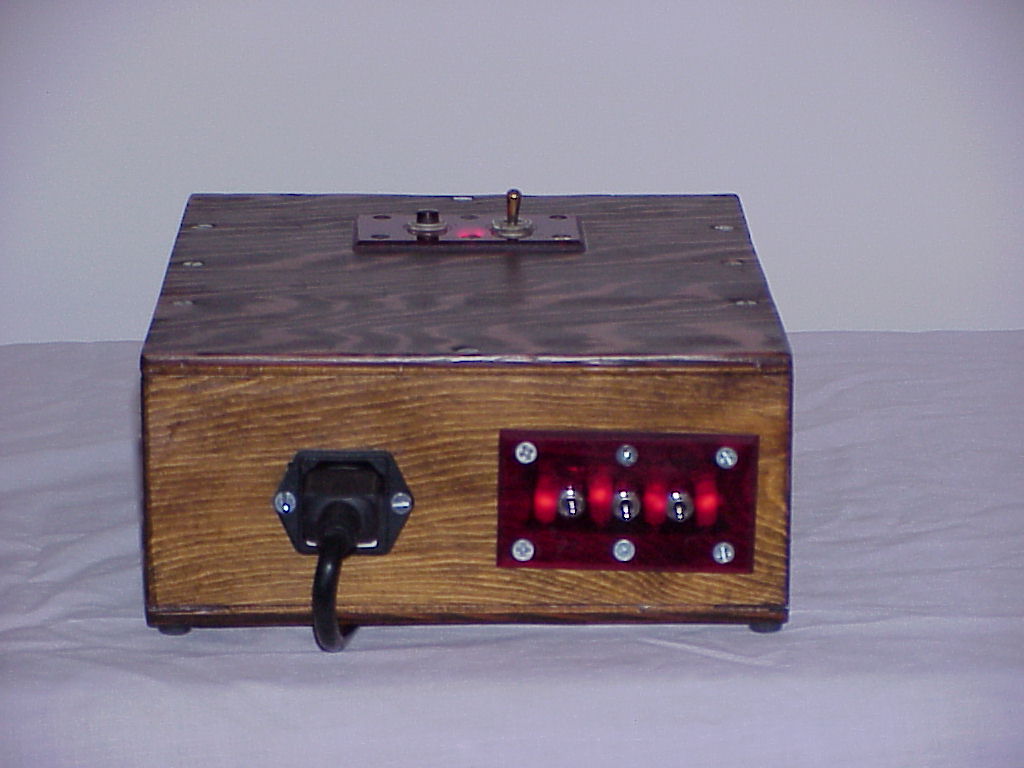
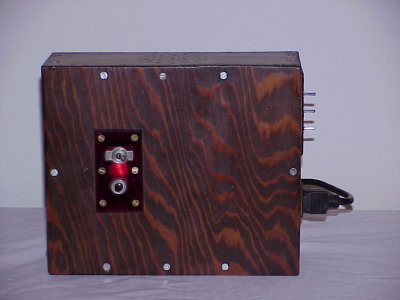
 The powercord entry and time-set switches can be seen, with some neons behind the red plastic to light them up.
 The alarm switch and snooze button can be seen, lit up with some more neons.
|